
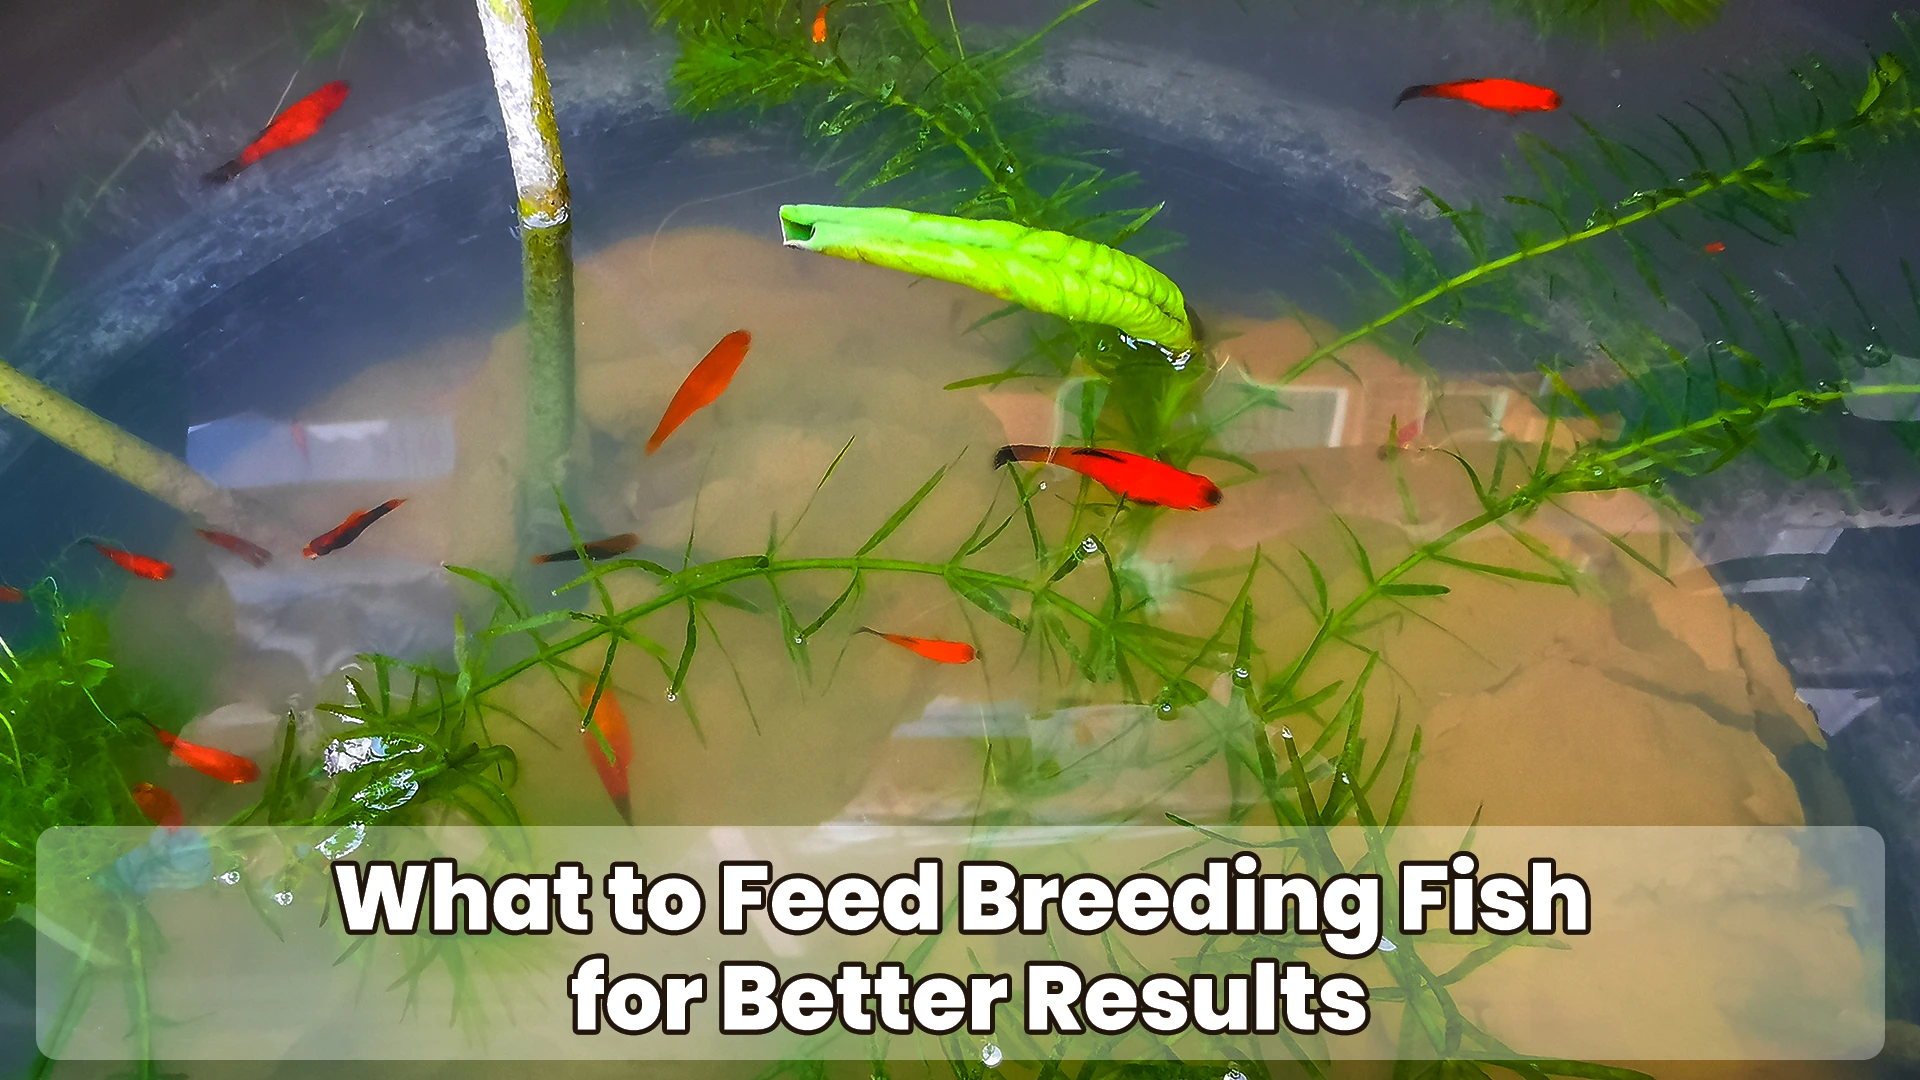
You set up the tank perfectly. The water is pristine — 76°F, pH sitting right at 7.0, the plants lush and green. The pair looks healthy. And yet — nothing. No eggs. No fry. Just two fish doing absolutely nothing.
I know exactly how that feels. I’ve been there more times than I’d like to admit, especially in my early years keeping fish. Back in 2017, I had a beautiful pair of sunset guppies that I desperately wanted to breed. I checked every possible parameter. I adjusted the temperature. I even moved the tank to a quieter spot in my house because I read somewhere that fish don’t like vibrations. Still nothing.
It took me weeks — and one very embarrassing conversation with a seasoned breeder at my local aquarium club — to realise the problem wasn’t my tank setup at all. It was what I was putting in their bellies.
What if the missing piece wasn’t the tank, the temperature, or the lighting — but what’s in their food bowl?
In this guide, you’ll discover exactly what to feed breeding fish to trigger natural spawning, improve egg viability, and raise more fry successfully — without spending a fortune on supplements. I’m going to share everything I’ve learned over seven-plus years of breeding guppies, tetras, danios, and a handful of other freshwater species. Some of it I learned from research. Most of it I learned the hard way.
Table of Contents
Why Nutrition Is the #1 Factor in Fish Breeding Success
How malnutrition silently kills breeding attempts
Here’s something most beginner hobbyists don’t realise: a fish that looks healthy can still be nutritionally deprived. Fish are remarkably good at masking deficiencies — right up until those deficiencies start affecting their reproductive system.
When a fish doesn’t get enough protein, vitamins, or essential fatty acids, their body essentially makes a decision: survival first, reproduction later. The energy that would go into producing eggs or milt (that’s the male fish equivalent of sperm, for those just starting out) gets redirected to just keeping the fish alive. It’s not a conscious choice, obviously — it’s pure biology.
Female guppies, for example, can carry between 20 and 200 fry per batch. But I’ve watched underfed females drop batches of fewer than 10, with most of those born weak or stillborn. The female wasn’t sick. She just hadn’t been given what she needed to produce a healthy spawn.
And the thing is — standard aquarium flake food, the kind you grab off the shelf at any pet shop? For maintenance it’s fine. For breeding? It’s barely enough. I’ll get into specifics soon, but the short version is: breeding fish have much higher nutritional demands than fish you’re just keeping as pets.
What “conditioning” actually means — and why breeders swear by it
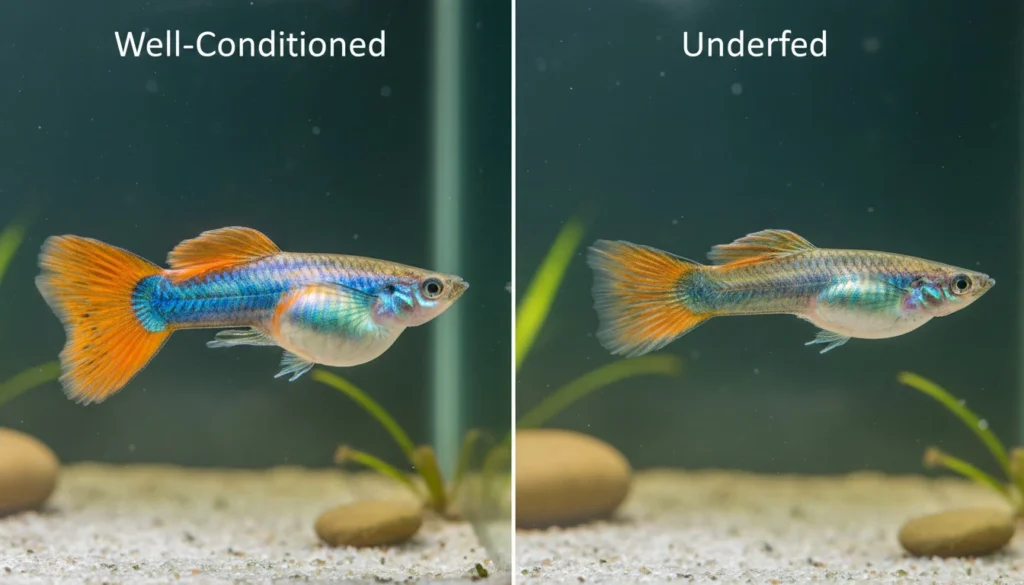
“Conditioning” is the term breeders use for a deliberate pre-breeding feeding protocol — a period, usually 1 to 2 weeks, where you feed your fish a richer, higher-protein diet specifically to prepare their bodies for spawning.
Think of it like an athlete carb-loading before a marathon. The fish need nutritional reserves to produce viable eggs, healthy milt, and — in the case of livebearers like guppies — to grow strong fry internally. Without those reserves, even a textbook-perfect breeding setup will produce disappointing results.
I once lost an entire guppy spawn and spent three days blaming my heater. The temperature had fluctuated slightly, and I convinced myself that was the culprit. It wasn’t until I joined an online breeding forum and described my feeding routine that someone gently pointed out I’d been feeding the same flake food for six months without any variety. My fish were, quite literally, underfed for what I was asking of them. I felt like an idiot. But — I never made that mistake again.
The good news is that conditioning isn’t complicated or expensive. Let me show you exactly what to feed.
The Best Foods for Conditioning Breeding Fish
Live foods — brine shrimp, daphnia, bloodworms (why they’re so powerful)
If there’s one upgrade that will make the single biggest difference to your breeding fish diet, it’s adding live food. Nothing else comes close — not even the best freeze-dried alternatives.
Here’s why. Live food — particularly baby brine shrimp (Artemia nauplii), daphnia, and bloodworms — triggers a hormonal response in fish that mimics their natural environment. In the wild, a sudden abundance of live prey signals that conditions are good, food is plentiful, and it’s a safe time to reproduce. Your fish’s biology responds accordingly.
Baby brine shrimp are my personal go-to. They’re small enough for most species, incredibly nutritious (roughly 60% protein when freshly hatched), and you can hatch them at home from a $5 bag of eggs and a basic hatchery setup. I hatch mine every 24–48 hours in a small plastic bottle with an air stone — takes about 10 minutes of actual effort.
Daphnia — tiny water fleas — are brilliant for conditioning. They’re high in protein, act as a gentle laxative which helps keep fish in good digestive health, and most fish go absolutely crazy for them. If your fish are being picky about food, daphnia usually fixes that fast.
Bloodworms sit third on my list. They’re protein-rich and fish love them, but they’re also higher in fat — so I use them as a treat two or three times a week rather than a daily staple during conditioning.
Frozen and freeze-dried alternatives — a busy hobbyist’s best friend
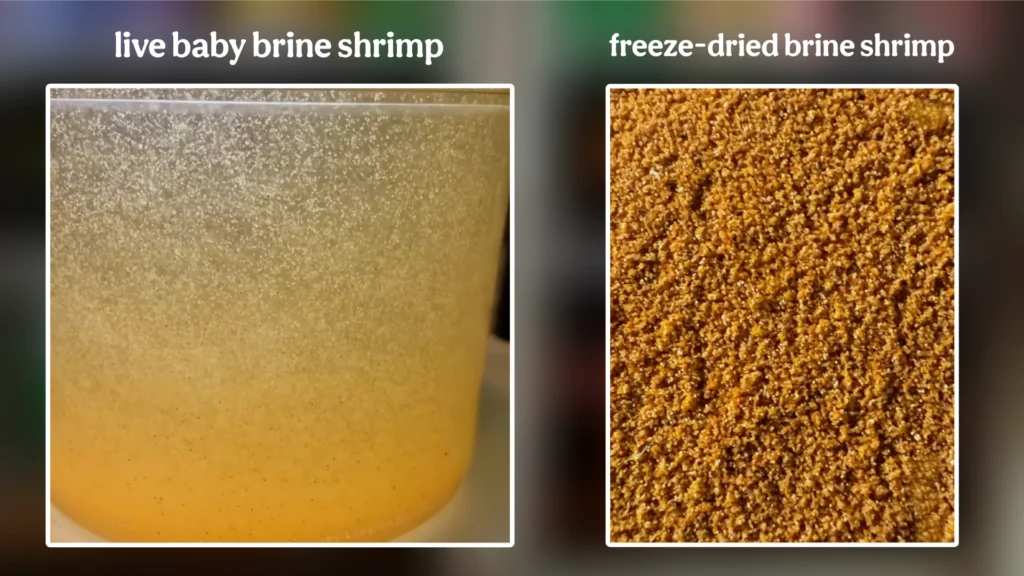
Real talk: I don’t always have the time to hatch live brine shrimp every day. Life gets busy. And that’s completely okay — frozen and freeze-dried options are genuinely good substitutes, especially for the days when live isn’t possible.
Frozen bloodworms and frozen brine shrimp are widely available and retain most of the nutritional value of live food. The key difference is that they won’t trigger quite the same instinctual feeding response as live prey, but for fish breeding nutrition purposes they’re more than adequate.
One thing I learned the hard way with freeze-dried food: always rehydrate it first. Drop a small pinch into a cup of tank water for 30 seconds before feeding. Freeze-dried food can expand inside a fish’s stomach and cause bloating — I’ve lost a fish that way, and it was completely avoidable.
Think of live foods as fresh produce and freeze-dried as canned — both work, but one gives your fish a serious edge. Use live when you can, frozen when you can’t, and freeze-dried when that’s all you have. Any combination is better than flakes alone.
High-protein flakes and pellets — what to look for on the label
Not all high protein fish food for breeding is created equal. When you’re choosing flakes or pellets to supplement your conditioning diet, flip the packet over and look at the crude protein percentage. You want 45% or higher for conditioning purposes.
Brands I’ve personally had good results with include Hikari and New Life Spectrum — both have breeding-specific or high-protein lines that are genuinely formulated with nutrition in mind rather than just shelf appeal. Generic supermarket flakes typically sit around 30–35% protein. That’s fine for maintenance, but not what you want when you’re preparing fish for spawning.
Micro-pellets are especially useful for smaller species like guppies and neon tetras — the particle size means fish actually eat them properly instead of spitting out half-chewed bits into the water.
Best Diet for Specific Breeding Fish
Best diet for breeding guppies — small, frequent, protein-rich meals
Guppies are, honestly, my favourite fish to breed — they’re forgiving, fast, and incredibly rewarding. But the best diet for guppies breeding is a bit more nuanced than “just feed them more.”
Guppy breeders in the competitive hobbyist scene — the people entering fish shows and producing prize-quality strains — swear by a 3× daily feeding schedule during conditioning week. Morning, midday, evening. Each feeding is tiny — only what the fish will consume in under two minutes — but the frequency is what matters. Multiple small feedings throughout the day keeps their metabolism active and their reproductive system primed.
For breeding guppies specifically, my go-to conditioning rotation is: baby brine shrimp in the morning, micro-pellets (45%+ protein) at midday, and daphnia or frozen bloodworms in the evening. After about 10 days of this, I consistently see females looking noticeably rounder and males displaying more actively. Water temperature of 76–80°F (24–27°C) alongside this feeding protocol gives you the best results.
Egg-laying fish diet — tetras, danios, and what triggers spawning
Egg-layers like neon tetras and zebra danios have a slightly different nutritional response to conditioning. These species are often triggered to spawn by a combination of high protein feeding plus a small temperature increase — mimicking the warm rainy season conditions of their native rivers.
Zebra danios, for example, spawn at water temperatures between 64–74°F (18–24°C), but a gradual increase toward the upper end of that range, combined with 10–14 days of live daphnia and baby brine shrimp, dramatically increases spawn frequency. I’ve had danio pairs that produced zero eggs for weeks suddenly scatter hundreds of eggs within 48 hours of starting a conditioning protocol.
Tetras are a little trickier — they’re sensitive to water chemistry and can be shy spawners. But the egg laying fish diet principle is the same: high protein, small portions, live or frozen food daily.
Herbivore breeders — plecos and cichlids need a different approach
Worth a quick mention — not all breeding fish want high protein. Some species, particularly certain plecos and herbivorous cichlids, do better on a plant-heavy diet. Blanched zucchini, spirulina wafers, and algae-based pellets are better conditioning foods for these guys. Getting the diet wrong for a herbivore can actually reduce breeding success rather than improve it. If you’re unsure about your specific species, a quick search on species-specific forums will save you a lot of guesswork.
How to Prepare Fish for Breeding: A 2-Week Feeding Schedule
The conditioning protocol — step by step
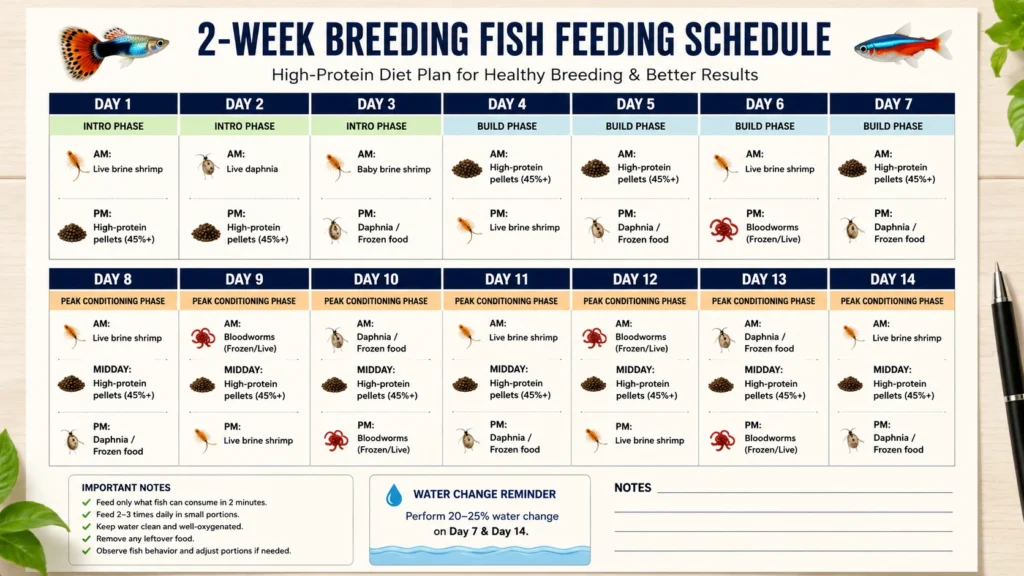
This is the schedule I use personally and teach to every beginner who asks me how to prepare fish for breeding. It takes two weeks, costs almost nothing extra, and the difference in results is remarkable.
Here’s the breakdown:
- Days 1–3: Continue normal feeding, but add one daily serving of daphnia or live brine shrimp. This gentle introduction starts building nutritional reserves without shocking the fish’s system.
- Days 4–7: Increase to two feedings daily — morning feeding is high-protein pellets or flakes (45%+ protein), evening feeding is live or frozen food. This is where conditioning really kicks in.
- Days 8–14: Peak conditioning. Feed two to three times daily, with live or frozen brine shrimp, daphnia, or bloodworms included every day. Female fish should visibly fill out around the belly. Males should display increased colouration and courtship behaviour.
- Day 14–15: Introduce the conditioned pair to a prepared breeding tank. At this point, their bodies are primed — you’ve done the work.
Feeding frequency and portion size — the mistake everyone makes
I’ll be honest — overfeeding was my biggest mistake for the first two years of this hobby. I thought more food meant better results. What it actually meant was cloudy water, ammonia spikes, and stressed fish that refused to spawn.
The rule I now follow: feed only what your fish consume in 2 minutes. That’s it. If there’s food sitting on the substrate after 2 minutes, you’ve fed too much. Remove the excess immediately with a small net or turkey baster. This keeps water quality high — and high water quality is, weirdly, just as important as diet when it comes to spawning success.
For a standard 10-gallon (38-litre) breeding setup, I’m typically feeding portions the size of my thumbnail — tiny, honestly. But consistently, twice a day, with high-quality food? That outperforms a single large feeding of mediocre flakes every single time.
Foods to Avoid When Breeding Fish
Low-quality flake foods that hurt reproductive health
Some fish foods are basically junk food. I don’t say that to be harsh — I say it because I spent money on them for years before I knew better.
Budget flakes — especially the generic supermarket variety — are often 60–70% wheat and corn filler. The protein percentage is low, the fat quality is poor, and the vitamins degrade rapidly once the packet is opened (most lose significant nutritional value within 3 months of opening). Your breeding pair deserves better than that.
If flakes are all you have right now, that’s okay — but check the label. If the first three ingredients are wheat, corn, or soy rather than a named fish or shrimp meal, consider it a short-term option while you source something better.
Overfeeding dangers — dirty water = failed spawns
There’s a direct line between overfeeding and failed spawns. Excess food rots, breaks down into ammonia, and sends your water quality into a spiral. Fish under water quality stress don’t breed. They can’t — their bodies are in survival mode.
Ammonia levels above 0.25 ppm will suppress reproductive behaviour in most freshwater species. Nitrite above 0.25 ppm is actively toxic. You can have the perfect diet, the perfect breeding pair, and a carefully prepared tank — and one week of overfeeding will undo all of it.
Test your water twice a week during conditioning. It takes five minutes and tells you immediately if something’s off. Honestly? It’s the single most underused tool in the beginner’s toolkit.
Feeding Fry After a Successful Spawn
First foods for newborn fry — infusoria, microworms, baby brine shrimp
Getting the spawn is exciting. Keeping the fry alive through that first week — that’s the real win.
Newborn fry have tiny mouths. Most can’t eat crushed flakes for the first 5–7 days of life, no matter how finely you crush them. What they can eat is infusoria — microscopic organisms that grow naturally in established aquarium water — or commercial liquid fry food like Hikari First Bites, which is specifically designed for the first days of life.
After day 5 or so, introduce baby brine shrimp nauplii (freshly hatched brine shrimp — the tiniest stage). These are absolutely perfect for fry: protein-rich, bite-sized, and the movement of live nauplii stimulates the fry’s feeding instinct naturally. I also use microworms as an alternative — they’re easy to culture at home in a small container with oatmeal and bread yeast, and fry devour them.
Feed fry 4–5 times daily in tiny amounts. Yes, that sounds like a lot — but fry grow fast and their digestive systems need constant input. Fry that are underfed in the first two weeks often show stunted growth that never fully corrects itself.
When to switch to crushed flakes
At around 2 weeks old, most fry are large enough to start taking very finely crushed high-quality flakes. I introduce these gradually alongside live and frozen food rather than switching over completely. By week 4, most species can eat the same food as the adults — just in smaller pieces.
One thing I always tell people: don’t rush this transition. I’ve seen impatient hobbyists switch to flakes too early and lose half a batch of fry to starvation because the fish simply couldn’t process the food yet. The extra effort in those first two weeks pays off in the survival rate. I regularly see 70–80% fry survival rates with this approach, compared to around 30–40% when I was doing it wrong early on.
Frequently Asked Questions
What is the best live food for conditioning breeding fish? Baby brine shrimp are my top recommendation for most species — they’re roughly 60% protein when freshly hatched, available as eggs year-round, and easy to hatch at home with basic equipment. Daphnia is a close second, especially if your fish seem sluggish or constipated. Bloodworms are excellent as a treat but a bit fatty for daily use.
How long should I condition my fish before breeding? Two weeks is my standard recommendation, though I’ve seen results in as little as 10 days with very healthy fish. The key is consistency — two small protein-rich feedings per day, every day, for the full conditioning period. Don’t rush it. The fish’s body genuinely needs time to build the reserves required for a successful spawn.
Can I use freeze-dried food instead of live food for breeding? Yes — freeze-dried is a solid alternative when live isn’t available. The important thing is to rehydrate it before feeding: drop the food in a small cup of tank water for 30 seconds first. Dry freeze-dried food can expand in the stomach and cause issues. Nutritionally it’s close to live, though it won’t trigger the same hormonal spawning response as moving prey.
What should I feed guppies specifically to improve breeding results? For the best guppy breeding diet, I recommend: baby brine shrimp in the morning, high-protein micro-pellets (45%+ crude protein) at midday, and daphnia or frozen bloodworms in the evening — all in tiny portions, three times daily during conditioning week. Keep water temperature at 76–80°F (24–27°C) and do a 20–25% water change every 3–4 days to keep conditions pristine.
What do newborn fry eat after hatching? For the first 5–7 days, infusoria or liquid fry food (like Hikari First Bites) is ideal. From day 5 onward, introduce freshly-hatched baby brine shrimp nauplii or microworms. At around 2 weeks, finely crushed high-quality flakes can be introduced alongside live food. Feed fry 4–5 times daily in very small amounts — their fast metabolism demands frequent feeding, especially in those critical first weeks.
Final Thoughts
When I look back at those early years — the failed spawns, the confused forum posts, the heater I blamed for everything — I can see now that almost every disappointment came back to nutrition. Not because I didn’t care, but because nobody had ever clearly explained how fundamental feeding was to the whole process.
The truth is, improving fish breeding success doesn’t require fancy equipment or expensive supplements. It requires understanding what your fish actually need — and then consistently providing it. High-protein live food, a structured conditioning period, appropriate feeding frequency, and clean water. That’s the whole formula.
If there’s one thing I want you to walk away with, it’s this: start with the food. Before you adjust anything else, run a two-week conditioning protocol with live or frozen food and high-protein pellets. Watch what happens. I’m genuinely excited for you to see the difference it makes — because once you crack this, breeding fish stops being a frustrating mystery and starts being one of the most rewarding things you can do in this hobby.
Good luck. And drop a comment below if you want help tailoring a feeding plan to your specific species — I read every one.
— Kd Sivanath

KD Sivanath is an aquarium enthusiast with over 7 years of experience in fish keeping and breeding. He specializes in helping beginners learn simple and effective methods for breeding popular aquarium fish. Through this blog, he shares practical tips, real-life experience, and easy-to-follow guides to help anyone start and succeed in fish breeding.