
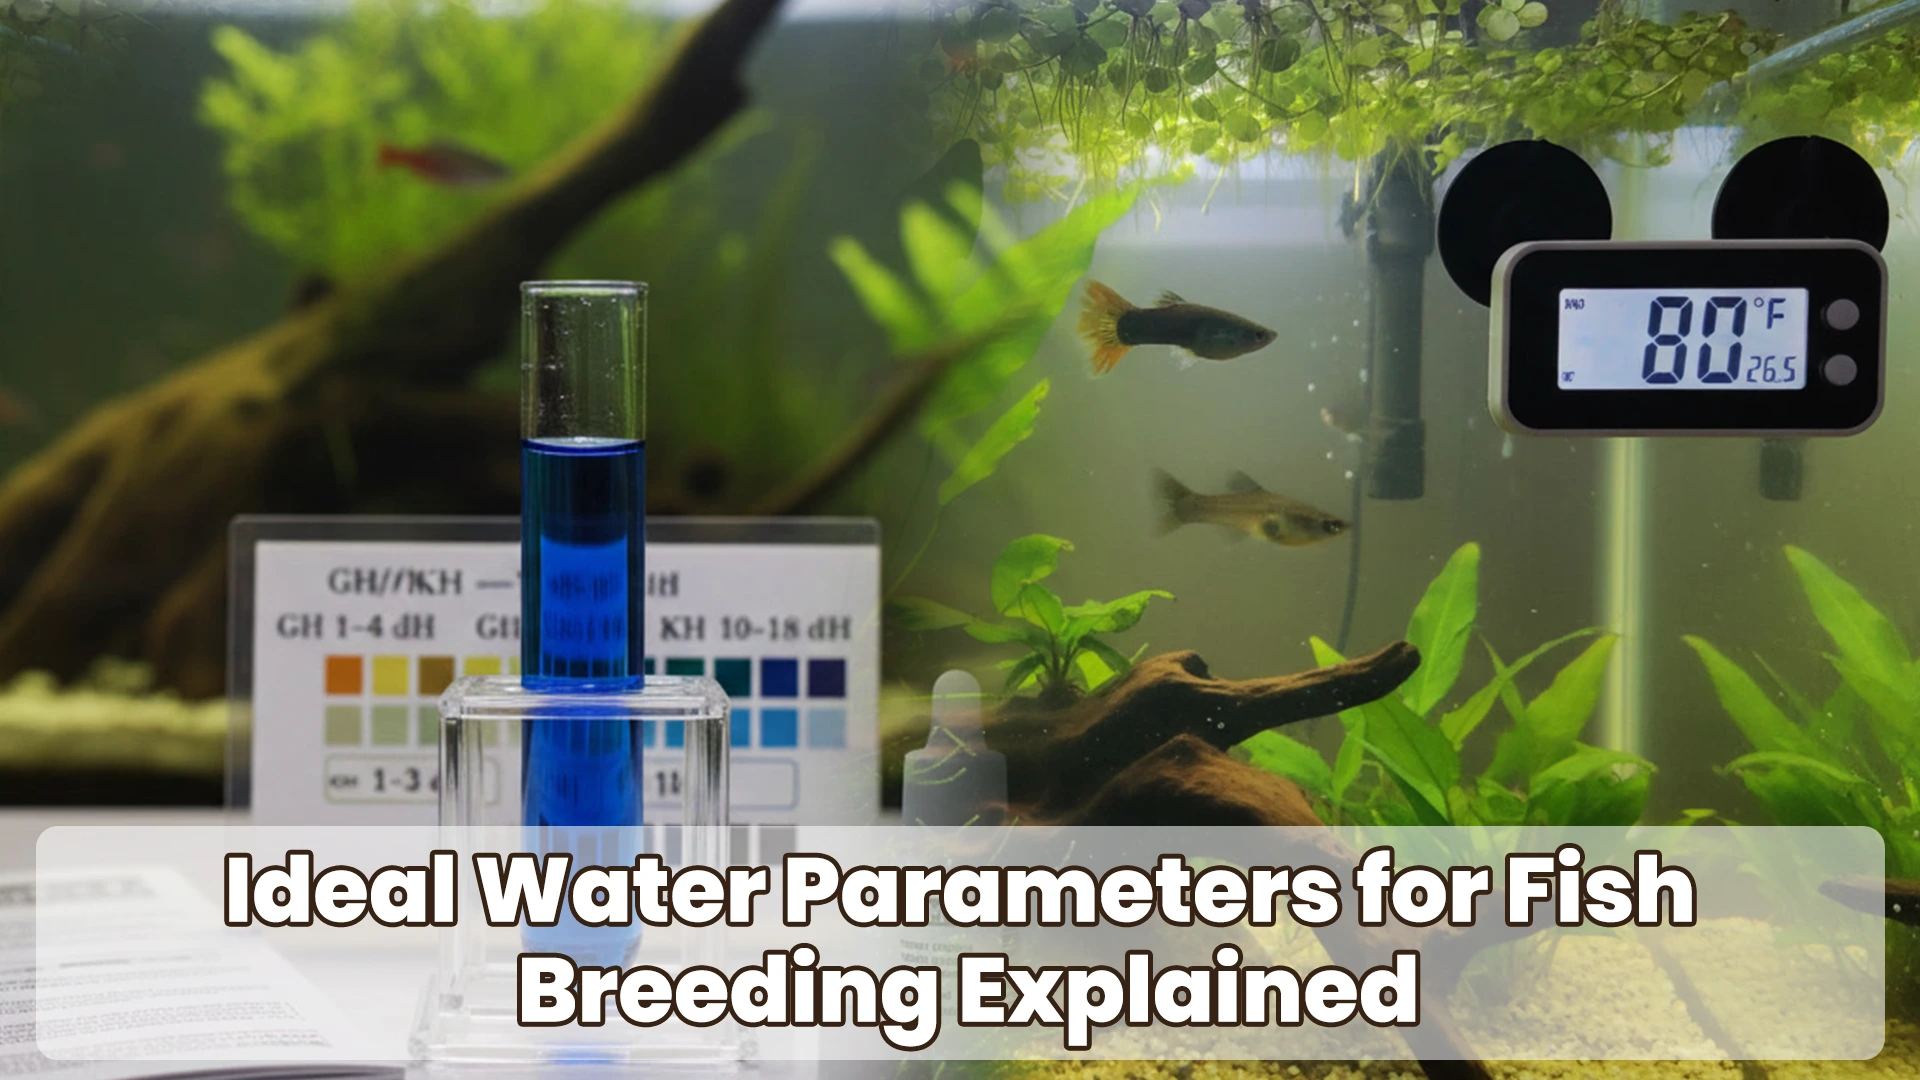
You’ve got a healthy pair of guppies, a clean tank, good food — and still nothing. No eggs. No fry. Just two fish doing absolutely nothing productive. I’ve been there. More times than I care to admit, honestly.
I remember spending an entire weekend in 2018 setting up what I thought was the perfect breeding tank for my lemon tetras. New heater, sponge filter, live plants, a nice pair of fish with obvious courtship behavior. Two weeks later? Nothing. I was frustrated enough to just sit in front of the tank staring, like somehow that would help.
Here’s what I eventually figured out — the tank looked fine. But looks are deceiving in this hobby. The invisible stuff, the water chemistry nobody talks about enough, was completely off. pH too high, hardness all wrong, temperature just a touch below the trigger zone. The fish weren’t being stubborn. They were stressed at a biological level that I simply couldn’t see.
Water parameters are, without question, the most commonly overlooked reason breeding attempts fail. Get them right, and fish will often do the work themselves. Get them wrong, and it doesn’t matter how good your pair is or how perfect the tank looks.
By the end of this article, you’ll know exactly what each parameter should be, why it matters for spawning, and how to dial things in before you even add your breeders.
Table of Contents
Why Water Parameters Matter More Than You Think
The Invisible Stress Your Fish Are Hiding
Fish don’t show stress the way mammals do. They don’t pace. They don’t whine. They just… don’t breed. Or they breed poorly. Or the eggs don’t hatch, or the fry die within days. And you’re left wondering what went wrong.
I’ve watched seemingly healthy fish — eating well, swimming normally, no signs of disease — completely shut down reproductively because the water wasn’t right. In my experience, this is the number one reason hobbyists give up on breeding before they ever see success.
What’s actually happening beneath the surface is a physiological stress response. Fish under chronic water quality stress produce elevated cortisol (yes, fish have stress hormones too), and that hormone actively suppresses reproductive function. It’s the body essentially deciding: this is not the right time to have offspring. Evolution built that in for good reason.
The tricky part? Fish can tolerate a wide range of conditions for survival without ever showing obvious symptoms. But reproduction is a luxury behavior — it requires conditions to be not just acceptable, but genuinely optimal. That’s the distinction most beginners miss.
How Bad Water Blocks Reproductive Hormones
This isn’t just theoretical. Research into fish endocrinology has shown that parameters like pH and hardness directly influence the hormonal signaling pathways that trigger spawning. Gonadotropin-releasing hormones, which kick off the whole spawning cycle, are sensitive to environmental stressors.
Ammonia, even at sub-lethal levels — we’re talking 0.25 ppm or below — can suppress egg production and reduce sperm viability in many freshwater species. I had a breeding pair of corydoras once that I simply could not get to spawn, no matter what I did. Finally tested with a proper liquid kit (not the strips, more on that later), and I had a creeping ammonia level around 0.5 ppm. Not enough to kill them. Enough to stop them breeding entirely.
Once I addressed the ammonia issue, they spawned within about nine days.
So what does “right” actually look like? Let’s break it down parameter by parameter.
The Ideal Temperature Range for Breeding Fish
Why a Small Temperature Rise Can Trigger Spawning
Temperature is probably the most powerful breeding trigger you have direct control over. In nature, many species spawn in response to seasonal changes — often a warming trend that signals the rainy season or spring. You can mimic this at home, and it works surprisingly well.
For most tropical freshwater fish, the ideal aquarium temperature for breeding sits between 76°F and 82°F (24°C–28°C). But here’s the nuance: it’s not just about hitting the right temperature, it’s about the change. Raising the temperature by just 2°F–4°F over a couple of days can flip a switch for many species.
I do this regularly with my breeding tanks. I’ll run the tank a few degrees cooler during a “rest” period, then gradually raise the temperature using a programmable heater over 48 hours. That warming trend, combined with water changes, almost always induces spawning within a week. It feels almost like cheating — but it’s just biology.
Species-Specific Temperature Cheat Sheet
Different fish have very different sweet spots, and getting this wrong is one of those silent killers I mentioned.
| Species | Breeding Temp Range | Notes |
|---|---|---|
| Guppies | 77°F–82°F (25°C–28°C) | Very forgiving; warmer end accelerates gestation |
| Betta splendens | 80°F–86°F (27°C–30°C) | Males won’t build bubble nests below 78°F |
| Discus | 84°F–88°F (29°C–31°C) | Requires very warm, soft water |
| Neon Tetras | 75°F–79°F (24°C–26°C) | Cooler than most; sensitive to overheating |
| Corydoras | 72°F–77°F (22°C–25°C) | Temperature drop of 5°F often triggers spawning |
| Angelfish | 80°F–84°F (27°C–29°C) | Consistent temp is more important than exact value |
| African Cichlids | 78°F–82°F (25.5°C–28°C) | Stability matters; rapid changes cause stress |
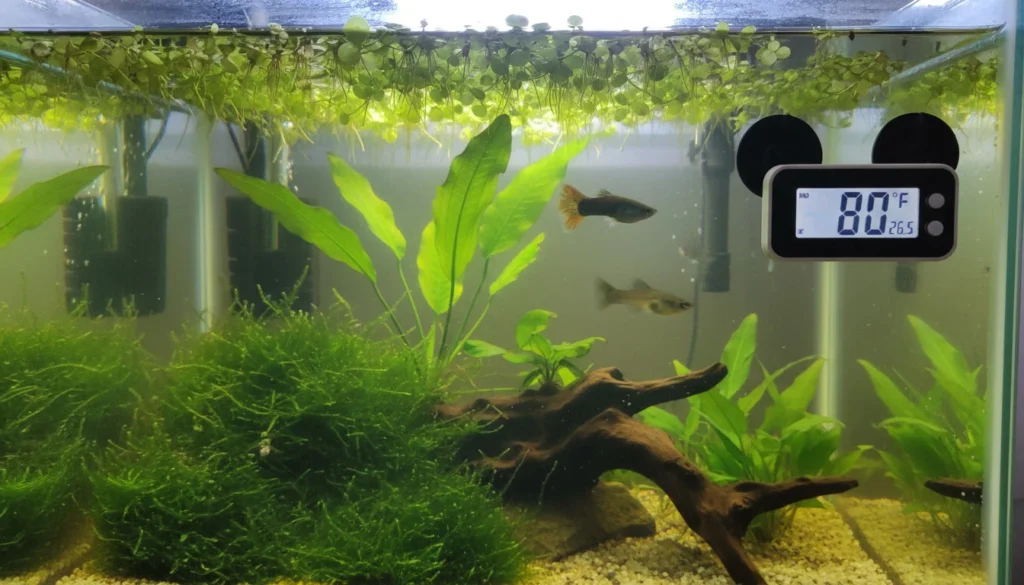
Notice the corydoras entry — that one surprised me the first time I learned it. For many cold-season breeders, it’s actually a temperature drop combined with a big water change that triggers spawning. A lot of online advice just says “raise the temperature” and that’s actually the wrong advice for cories. I wish someone had told me that in 2017.
How to Safely Raise Temperature Without Shocking Your Fish
Slow and steady wins this race. Never jump the temperature more than 2°F (1°C) per hour. Thermal shock is a real risk, especially for more sensitive species.
If you’re using a standard non-programmable heater, you can raise the dial incrementally over two days. If you can swing it, a programmable heater (I’ve used the INKBIRD IBS-TH2 with a cheap aquarium heater as a backup control — works beautifully) lets you set a gradual ramp schedule. It’s one of those small investments that pays off repeatedly.
Temperature is just the warm-up. The pH of your water plays an equally critical role.
Getting the pH Right for Spawning Success
What pH Range Most Freshwater Breeders Target
pH is a measure of how acidic or alkaline your water is, on a scale from 0 (extremely acidic) to 14 (extremely alkaline), with 7.0 being neutral. Most freshwater fish bred in captivity come from soft, slightly acidic river environments in South America, Southeast Asia, or Central Africa — and their reproductive systems evolved for those conditions.
For the majority of community and tropical fish species, a breeding pH of 6.5 to 7.2 is the sweet spot. Discus and many tetras want it even lower — down to 6.0 to 6.5. African cichlids are the outliers, thriving and breeding at 7.8 to 8.5 because they evolved in the alkaline rift lakes.
When pH drifts outside the target range — especially above 7.5 for soft-water species — you’ll often see reduced egg production, poor fertilization rates, and in severe cases, egg fungusing even when the eggs appear to develop. I’ve lost entire spawns of cardinal tetras to this exact issue because my tap water comes out of the tap at 7.8 here in my area. Took me two failed attempts to connect the dots.
Natural Ways to Lower or Raise pH
Lowering pH (making water more acidic):
- Peat moss or peat filtration — stuff a mesh bag of peat into your filter. Releases humic and tannic acids naturally. Takes a few days to kick in fully but is very stable.
- Driftwood — works similarly to peat, plus it looks great. Boil it first to remove excess tannins if you don’t want the brown “blackwater” tint.
- Indian almond leaves (Catappa leaves) — these have become my personal favorite for breeding tanks. They lower pH gently, release antibacterial compounds, and apparently mimic the natural leaf-litter environments many soft-water species breed in. A large leaf per 10 gallons is a good starting point.
- RO water blended with tap — if you need precision control, this is the most reliable method.
Raising pH (making water more alkaline):
- Crushed coral or aragonite substrate
- Limestone rocks or Texas Holey Rock (popular for cichlid tanks)
- Baking soda in very small, carefully measured doses — but honestly, I’d use substrate-based methods before ever touching baking soda
Once you’ve sorted pH, it’s time to think about water hardness — the parameter most beginners completely overlook.
Water Hardness: GH, KH, and Why They Matter
GH vs. KH Explained Simply
Water hardness trips up a lot of beginners because there are actually two different types, and they’re measuring different things.
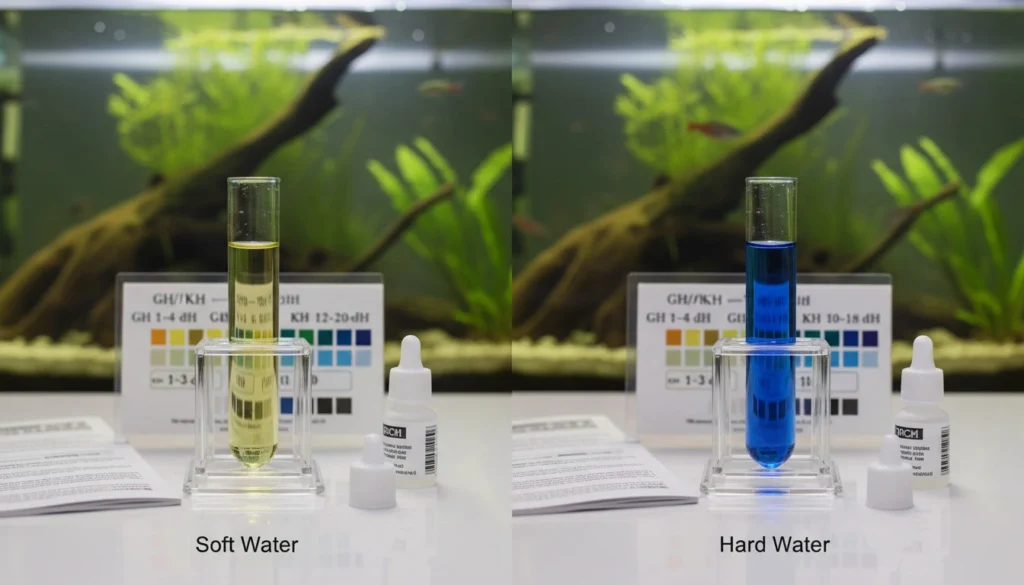
GH (General Hardness) measures the total concentration of dissolved minerals — mainly calcium and magnesium ions. This is what people usually mean when they say “hard water” or “soft water.” It’s measured in degrees of hardness (°dH) or ppm.
KH (Carbonate Hardness or Alkalinity) measures the concentration of carbonate and bicarbonate ions specifically. This one is often more important for pH stability — it acts like a buffer, preventing pH from swinging wildly. Low KH means your pH can crash overnight, which is just as stressful as having the wrong pH to begin with.
Think of GH as the mineral content and KH as the stability system. Both matter, just for slightly different reasons.
Soft Water vs. Hard Water Breeders
This is where knowing your species becomes really important:
Soft water breeders (GH: 1–8 °dH, KH: 1–4 °dH): Discus, cardinal tetras, most South American dwarf cichlids (Apistogramma), chocolate gouramis, altum angelfish, most wild-caught fish
Moderate/adaptable breeders (GH: 6–15 °dH, KH: 4–8 °dH): Guppies, mollies, platies, swordtails, most corydoras species, zebra danios, most common community fish
Hard water breeders (GH: 12–20+ °dH, KH: 10–18 °dH): African cichlids (Mbuna, peacocks, haplochromines), livebearers from brackish origins, goldfish
I spent six months trying to breed Apistogramma cacatuoides in water that was 15 °dH out of my tap. They paired up, they displayed, the female would even go into the cave — and then nothing. Once I started blending RO water to bring the GH down to around 4–5 °dH and KH to about 2 °dH, I had my first spawn within three weeks. Twenty-seven fry from that first batch. I nearly fell off my chair.
How to Soften or Harden Your Water at Home
To soften:
- Blend with RO (reverse osmosis) water — the most reliable method. A budget RO unit runs around $50–$80 and pays for itself quickly if you’re serious about breeding.
- Use peat filtration (reduces GH gradually)
- Rainwater collection (check your local air quality first — urban rainwater can carry pollutants)
To harden:
- Add crushed coral or aragonite to the filter or substrate
- Use limestone-based rocks in the tank
- Commercial mineral additives (Seachem Equilibrium is one I’ve used with good results for remineralizing RO water)
But even with perfect pH and hardness, dirty water can ruin everything. Let’s talk ammonia and nitrates.
Ammonia, Nitrite, and Nitrate Levels in a Breeding Tank
The Nitrogen Cycle — Why Fry Are More Sensitive Than Adults
If you’re new to fishkeeping, here’s the quick version of the nitrogen cycle: fish produce waste, waste breaks down into ammonia, beneficial bacteria convert ammonia to nitrite, then nitrite to nitrate. Nitrate is the least harmful of the three, but it still accumulates and needs to be removed through water changes.
Adult fish can tolerate relatively modest levels of nitrate — up to about 40 ppm in many species without obvious symptoms. But fry are dramatically more sensitive. Baby fish have less developed detoxification systems, and nitrate levels above 20 ppm can stunt growth, weaken immune systems, and increase mortality significantly in the first few weeks of life. I’ve seen it firsthand — two batches of cherry barb fry, same spawn, different tanks. The one with nitrates around 30 ppm had about 60% survival to 4 weeks. The one I kept at under 10 ppm through aggressive water changes had 92% survival. Same fish, same food, different numbers.
Acceptable Ammonia and Nitrate Thresholds for Breeding
Here’s what you’re aiming for in a breeding tank — and these numbers are non-negotiable in my book:
- Ammonia: 0 ppm — any detectable ammonia is a problem. Period.
- Nitrite: 0 ppm — same story. Nitrite is toxic even at low levels.
- Nitrate: below 20 ppm for adults in a breeding setup; below 10 ppm when fry are present.
- pH: stable (whatever your target range is — stability matters as much as the number itself)
If you’re seeing anything other than zero for ammonia and nitrite, stop and troubleshoot the tank cycle before adding breeders. I can’t emphasize this enough.
Water Change Schedule During Breeding
Regular water changes are the simplest, most effective tool in a breeder’s kit. For breeding tanks, I run:
- Pre-spawning: 25–30% water change every 3–4 days, slightly cooler water to simulate the seasonal trigger
- Active spawning/eggs present: 15–20% daily water changes, very gently — avoid disturbing the eggs or nest
- Fry present (first 2 weeks): 10–15% daily, using a thin airline tube rather than a siphon to avoid sucking up babies
- Fry growing out: 20–25% every other day as bioload increases
Now that you know the individual parameters, let me show you how to set it all up before you even add the fish.
How to Set Up a Breeding Tank from Scratch
Equipment Checklist for Parameter Control
You don’t need an elaborate or expensive setup. What you need is precise and controllable. Here’s my baseline:
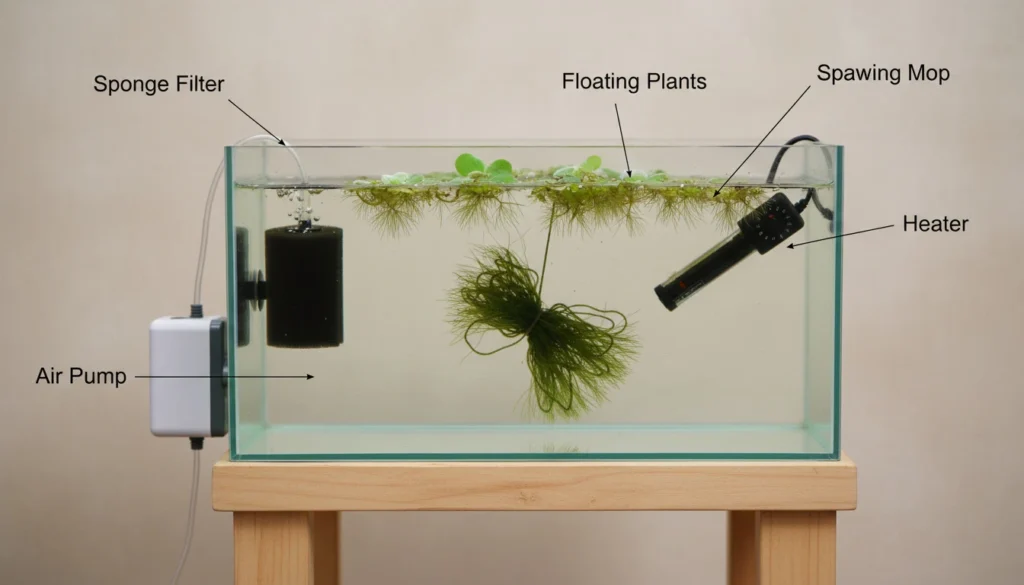
- Tank: 10–20 gallons for most species (smaller tanks are actually easier to control parameters in, counterintuitively)
- Heater: Quality adjustable heater + separate thermometer to verify. Never trust the heater’s built-in dial completely.
- Filter: A sponge filter is ideal — it provides biological filtration without the suction risk to eggs and fry that a hang-on-back or canister creates
- Test kit: API Freshwater Master Test Kit (liquid kit, not strips — I’ll explain below)
- pH adjustment: Indian almond leaves, peat, driftwood, or a commercial buffer depending on your target
- RO water or conditioned tap water: depending on how far your tap water is from your target parameters
- Breeding mop, spawning cave, or plants: species-dependent spawning site
Conditioning the Water Before Adding Breeders
This step gets skipped constantly. Do not skip it.
Set up the tank, cycle it fully (3–4 weeks minimum with a source of ammonia to feed the bacteria), and then dial in your parameters. Test for a full week before adding fish. You want to confirm that the pH is stable — not just hitting the right number once, but holding it across multiple days. A pH that reads 6.8 one day and 7.3 the next means your KH is too low and your water isn’t buffered.
Once parameters are stable for 7 days, then start conditioning your breeders in a separate tank — high-quality live or frozen foods, good lighting cycle, the works. After 2 weeks of conditioning, move them to the breeding tank.
Testing Your Water: Which Kit to Use and When
Real talk: API test strips are convenient and… that’s about the nicest thing I’ll say about them. They’re notoriously inaccurate, especially for pH, and the color comparison is difficult to read precisely. For general display tanks, fine. For breeding? Use a liquid drop test kit.
The API Freshwater Master Test Kit covers ammonia, nitrite, nitrate, and pH, and costs around $25–$30. It’s the kit most serious hobbyists recommend, and I’ve been using it for years. If you’re working with soft water species, also pick up a GH/KH test kit separately.
Test schedule for a breeding setup:
- Daily: ammonia and nitrite while tank is cycling
- Every 2–3 days: once cycled and before adding fish
- Before every water change: once fish are in
- Immediately if you notice unusual behavior: don’t wait for your scheduled test day
Finally, let’s pull everything together with a quick reference checklist you can bookmark.
Quick Reference: Ideal Parameters by Species
Guppies, Bettas, Discus, Tetras, Cichlids
| Species | Temp (°F) | pH | GH (°dH) | KH (°dH) | Max Nitrate |
|---|---|---|---|---|---|
| Guppies | 77–82 | 7.0–7.5 | 8–18 | 4–8 | 20 ppm |
| Betta | 80–86 | 6.5–7.5 | 3–12 | 2–5 | 20 ppm |
| Discus | 84–88 | 5.5–6.5 | 1–4 | 1–3 | 10 ppm |
| Neon Tetra | 75–79 | 5.5–7.0 | 1–8 | 1–4 | 10 ppm |
| Corydoras | 72–77 | 6.5–7.5 | 6–12 | 3–6 | 20 ppm |
| Angelfish | 80–84 | 6.5–7.5 | 3–8 | 2–5 | 20 ppm |
| Mbuna Cichlids | 78–82 | 7.8–8.5 | 12–20 | 10–18 | 40 ppm |
| Cherry Barbs | 73–81 | 6.0–7.0 | 4–10 | 2–6 | 20 ppm |
What to Do When Parameters Are Off Before Breeding
Don’t panic — and don’t try to fix everything at once. That’s the mistake I made early on. Rapid parameter swings are often more harmful than parameters that are a little off from ideal.
If pH is too high: add Indian almond leaves, and do a partial water change with RO water. Give it 24–48 hours, then retest.
If pH is too low: add a small amount of crushed coral to the filter. Again — slowly.
If ammonia or nitrite is detectable: stop. Do a 30–40% water change, add a cycled sponge filter from an established tank if you have one, and don’t add breeders until it’s been zero for at least 5 days consistently.
If temperature is off: adjust heater slowly, no more than 1–2°F per day.
The key word throughout all of this is patience. Water chemistry doesn’t respond instantly, and neither do fish. Give changes 2–3 days to stabilize before testing again and making further adjustments.
Frequently Asked Questions
What is the most important water parameter for breeding fish? Honestly? It depends on the species, but if I had to pick one that applies across the board, it’s ammonia — specifically keeping it at zero. Even small amounts of ammonia suppress breeding hormones and stress the fish at a cellular level. You can get away with slightly imperfect pH or temperature. You cannot get away with detectable ammonia when you’re trying to breed.
Can guppies breed in tap water straight from the tap? Often yes, guppies are resilient. But “can” and “optimal” are different things. If your tap water is very hard (above 20 °dH) or has a high pH (above 7.8), you’ll likely see reduced fry survival and slower gestation — which in guppies typically runs 21 to 30 days. A 50/50 blend of tap and conditioned water is a simple improvement most people don’t bother with but should.
How do I know if my water parameters are causing breeding failure? Test everything — systematically. Get a liquid test kit, test ammonia, nitrite, nitrate, and pH, and then compare your results to the target range for your specific species. If everything looks fine but they’re still not breeding, then look at the temperature and hardness. If all parameters are in range and they still won’t spawn, it’s likely a conditioning issue — the fish need better food, longer rest between attempts, or a simulated seasonal trigger.
How often should I do water changes in a breeding tank? Before spawning: every 3–4 days at about 25–30%. Once eggs are present: small daily changes of 10–15%, very gently. With fry present: 10–15% daily using a thin airline siphon to avoid accidental aspiration of fry. As fry grow and bioload increases, scale up to 20–25% every other day. Consistency matters more than any single large change.
Does water hardness affect egg hatching rates? Yes, significantly for some species. Soft-water species like discus and Apistogramma that evolved in low-mineral environments often fail to fertilize eggs or have very poor hatch rates in hard water above 10 °dH. The calcium-to-magnesium ratio can also affect egg membrane formation. This is one of the reasons soft-water species are considered “advanced” — they really do need the right hardness, not just the right pH.
Conclusion
After more than seven years of breeding everything from guppies to Apistogramma to discus (that last one nearly broke me, honestly), here’s what I keep coming back to: the fish know what they need. Your job is just to give it to them.
The parameters laid out in this article aren’t arbitrary numbers from a textbook. They’re the conditions these animals evolved in — the water chemistry their hormones, their eggs, their fry were designed for. When you match those conditions, you’re not tricking them into breeding. You’re removing the obstacles that were stopping them.
Get the ammonia to zero. Get the temperature in range for your species. Sort out the pH and hardness. Do your water changes. Be patient. Test regularly. That’s really the whole formula, as unglamorous as it sounds.
If there’s one thing I want you to walk away with, it’s this: don’t assume the water is fine. Test it. Measure it. Adjust it slowly. And once you dial it in and see those first little fry wiggling around the bottom of the tank — that feeling genuinely never gets old. Not after seven years, not ever.
You’ve got this.

KD Sivanath is an aquarium enthusiast with over 7 years of experience in fish keeping and breeding. He specializes in helping beginners learn simple and effective methods for breeding popular aquarium fish. Through this blog, he shares practical tips, real-life experience, and easy-to-follow guides to help anyone start and succeed in fish breeding.