
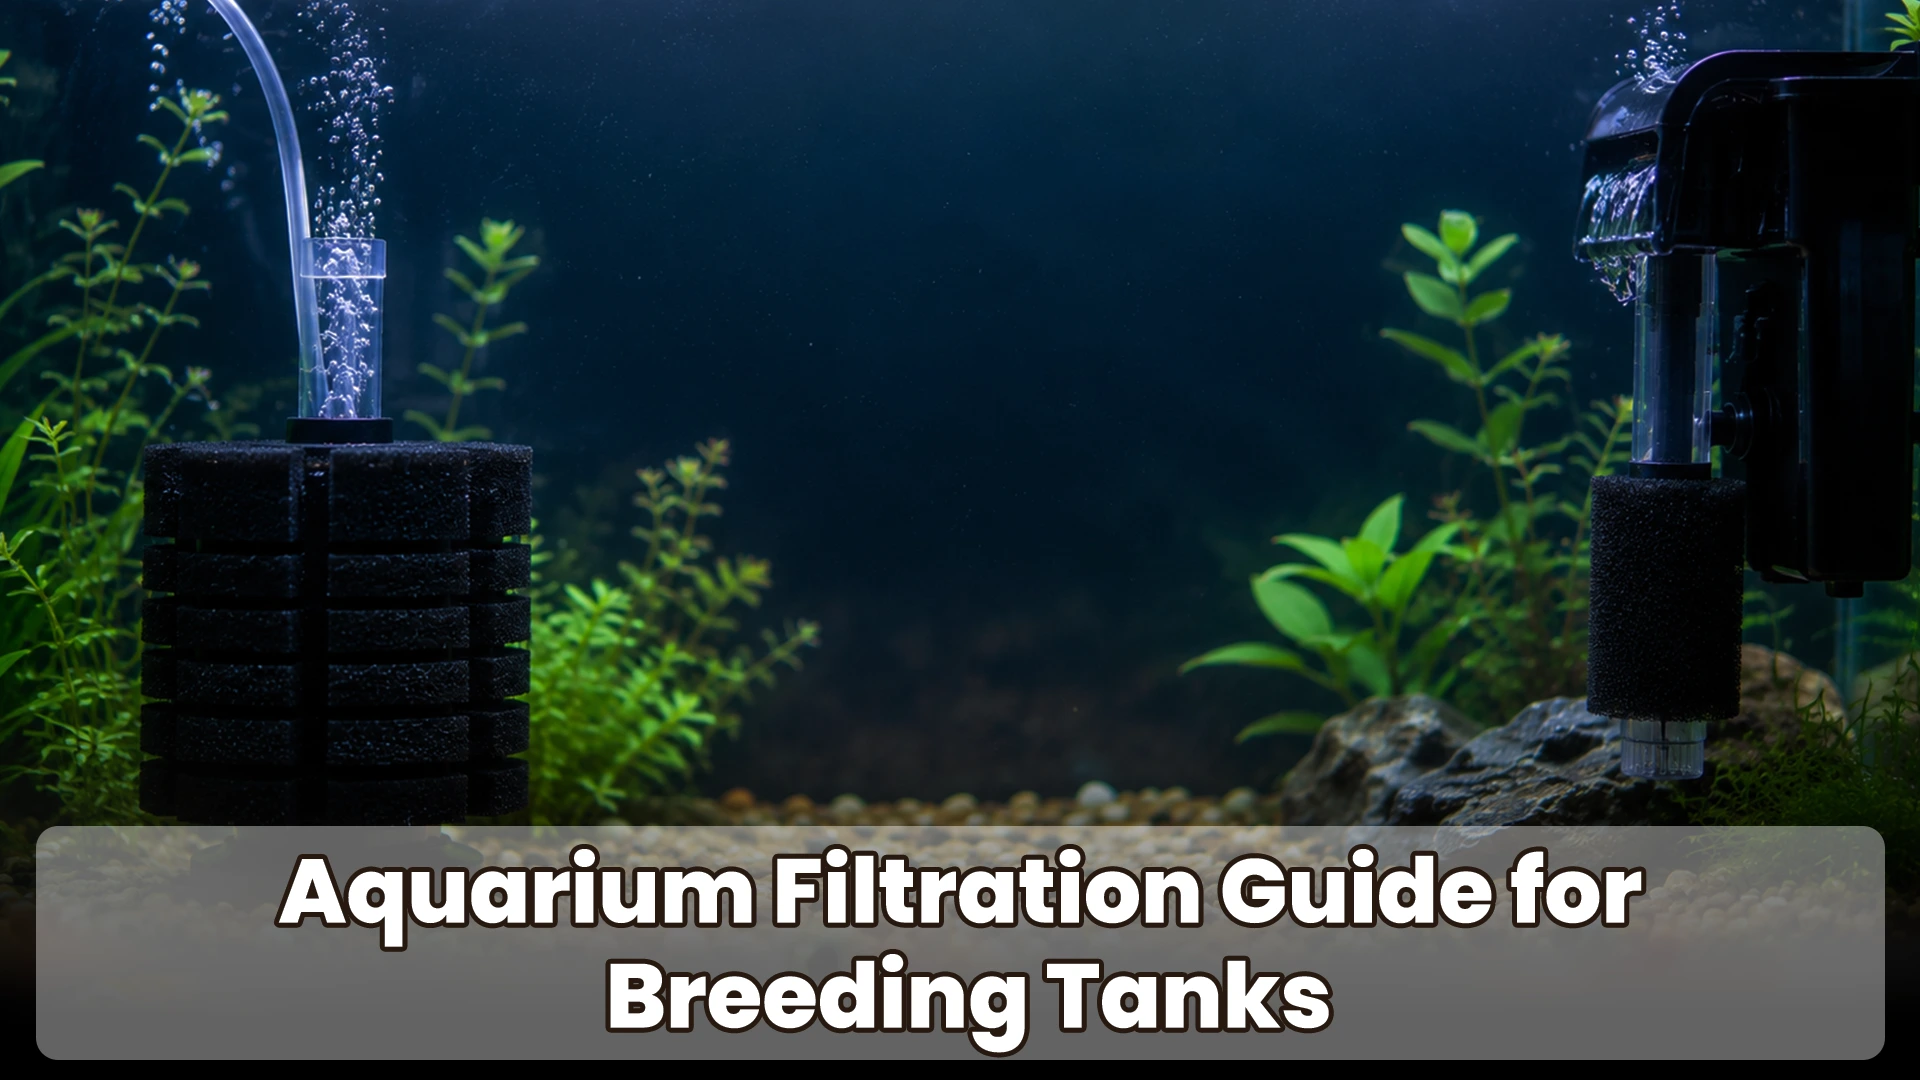
I remember the exact morning I checked my first guppy breeding tank and found… nothing. No fry. Not even the tiny translucent shadows I’d been watching for all week. I’d had a healthy female drop what I estimated was close to 40 fry the night before, and by morning most of them were just gone — pulled straight into the intake of a standard hang-on-back filter I’d grabbed because it was on sale.
That one hurt. I’d spent almost three weeks conditioning that female, watching her get rounder, checking the gravid spot every day like it was some kind of countdown. And then I lost most of the batch in less than twelve hours because I didn’t think about filtration the right way.
If you’re here because something similar just happened to you — or you’re trying to make sure it never does — I get it. Genuinely. Breeding fish is already a waiting game full of uncertainty, and losing fry to something as preventable as the wrong filter setup feels almost worse than losing them to bad luck. So let’s fix that. By the end of this guide, you’ll know exactly what filtration setup keeps your fry safe while still keeping your water clean and biologically stable — no guessing required.
Why Filtration Is Different in a Breeding Tank
Here’s the thing most beginners don’t realize until it’s too late: a breeding tank isn’t just a smaller version of your main aquarium. It plays by different rules entirely.
The Fry-Safety Problem: Why Regular Filters Are Dangerous
Standard filters are built to move water efficiently, and efficiency usually means strong intake suction. That’s great in a community tank full of adult fish who can swim away from it. It’s a death trap for fry that are barely strong enough to swim in a straight line, let alone fight current.
Fry in their first week of life are often weak swimmers by design — nature intended for them to hide in plants, not dodge a filter intake. A typical HOB filter can move anywhere from 100 to 400 gallons per hour depending on the model, and even the “low” setting on most of these is more than enough to pull in a fry under 5mm long.
Balancing Flow Rate vs. Biological Filtration
This is where it gets tricky. You need enough biological filtration to process ammonia and nitrite, but not so much water movement that fry get exhausted or injured. Honestly? Finding that balance was the single biggest learning curve for me when I started breeding seriously back in 2018.
What Changes Once Fry Are Free-Swimming
Once fry hit that free-swimming stage — usually 3 to 7 days after hatching for most livebearers, a bit longer for egg-layers — they get slightly stronger. But “stronger” doesn’t mean safe. I still wouldn’t trust an unmodified filter until fry are at least 3 to 4 weeks old.
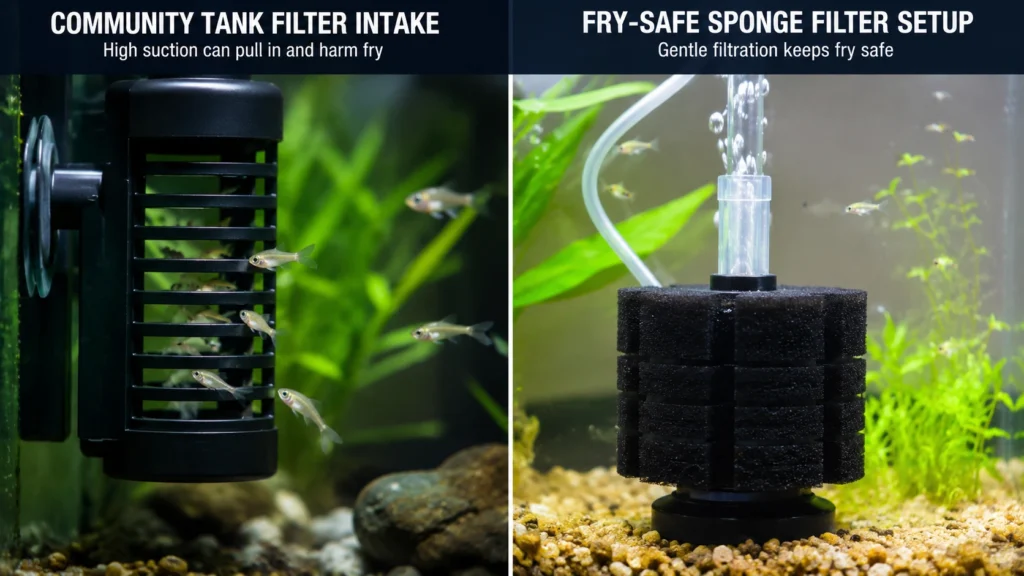
A community tank filter is built for power and turnover. A breeding tank needs something closer to a gentle current — enough to keep water moving and oxygenated without turning the tank into a fry blender. Once you understand why standard filters fall short, the next question is obvious — so what actually works?
Types of Aquarium Filters Explained (And Which Fit Breeding Tanks)
I’ve got, at last count, six active breeding tanks running at any given time, and — I’ll be honest — no two of them use the exact same filter. Different species, different fry sizes, different needs.
Sponge Filters — The Breeder’s Go-To
If you ask ten experienced breeders what they use, at least eight will say sponge filters. Mine are no exception. They’re gentle, cheap (usually $5–$15), and they double as both mechanical and biological filtration.
Hang-on-Back (HOB) Filters — Pros, Cons, and Fry Guards
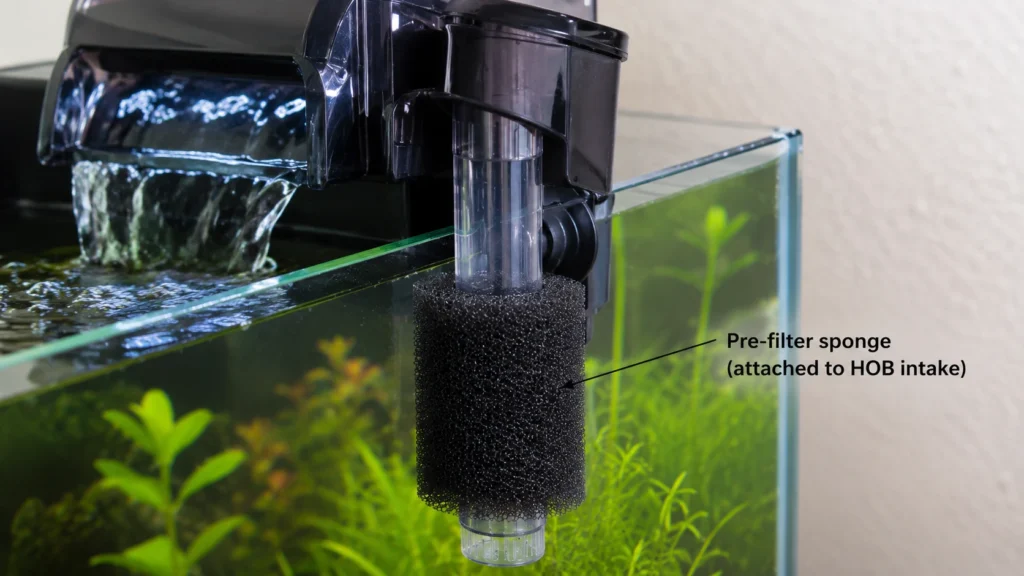
HOB filters aren’t inherently evil — I want to be clear about that, because some breeders act like they’re the enemy. They’re actually great for grow-out tanks once fry are bigger, and they’re easy to modify with a pre-filter sponge (more on that later).
Canister & Internal Filters — When They Make Sense
Canister filters are overkill for most breeding setups, in my opinion, unless you’re running a large cichlid breeding tank — say 40 gallons or more — where biological load is high. Internal filters sit somewhere in the middle; I use them occasionally but they’re not my first choice.
Of these, one filter type keeps coming up in breeder forums for good reason — let’s talk sponge filters.
Sponge Filters for Fish Breeding — The Complete Setup
I’ll admit, the first time someone told me to “just use a sponge filter,” I thought it sounded too basic to actually work. Turns out that’s kind of the point.
How Sponge Filters Work (Mechanical + Biological)
A sponge filter works through air-driven suction — an air pump pushes bubbles up through a tube inside the sponge, which pulls tank water through the sponge’s pores. Debris gets trapped mechanically, and beneficial bacteria colonize the sponge surface for biological filtration. No intake strong enough to hurt fry, and a massive surface area for bacteria to grow on.
Choosing the Right Size for Your Tank
For a 5–10 gallon breeding tank (typical for bettas or a single guppy female), a small sponge filter rated for up to 10 gallons works well. For a 20–40 gallon cichlid tank, go with a filter rated for at least double your tank size — biological load from larger fish adds up fast.
Air Pump Pairing and Flow Adjustment
Here’s where I actually messed up once. I paired a sponge filter with an air pump that was way too powerful for a 5-gallon betta fry tank — the bubbles were practically boiling out of the sponge, and the current was strong enough that fry were getting pushed around the tank. I had to add an inline valve to cut the airflow down. Lesson learned: bigger pump isn’t always better.
A sponge filter handles mechanical filtration beautifully, but breeding tanks live or die by their biological filtration — here’s why.
Biological Filtration Basics for Breeding Tanks
This is the part a lot of beginners skip past, and it’s honestly the most important section in this whole guide.
The Nitrogen Cycle in a Breeding Tank Context
Fish waste and uneaten food break down into ammonia, which is toxic even in tiny amounts — anything above 0.25 ppm can stress fry. Beneficial bacteria convert ammonia into nitrite (also toxic), and then a second type of bacteria converts nitrite into nitrate, which is far less harmful at low levels (under 20 ppm is generally considered safe).
Why Established Bacteria Colonies Matter More Here
In my experience, breeding tanks are way less forgiving than a mature display tank because fry are far more sensitive — even 0.5 ppm of ammonia can cause visible stress or stunted growth in fry under two weeks old. A fully cycled tank with a stable bacteria colony is non-negotiable if you want a decent survival rate.
Seeding a New Breeding Tank Without Crashing It
What I do now, every single time, is “borrow” a chunk of media or even just squeeze out an old sponge filter from an established tank into the new one. It instantly seeds beneficial bacteria and cuts the cycling time from what could be 4–6 weeks down to just a few days.
Good biology means nothing if your filter is unsafe for fry — so let’s cover how to fry-proof any filter you choose.
Making Any Filter Fry-Safe
You don’t have to throw out every HOB or canister filter you own. Most of them can be made safe with a few cheap modifications.
DIY Intake Guards and Pre-Filter Sponges
A pre-filter sponge — basically a foam sleeve that slips over your intake tube — is maybe the cheapest, most effective fix in this entire guide. They run about $3–$8 and instantly turn a dangerous intake into a soft, fry-safe barrier.
Adjusting Flow Rate Without Killing Cycling
You can reduce flow with a valve or by partially submerging the filter output, but don’t cut it so much that circulation stalls completely — stagnant water kills bacteria efficiency and lets waste settle where fry hide.
Signs Your Filtration Is Stressing Fry or Fry-Bearing Females
Watch for fry clustering in corners away from current, gasping at the surface, or a gravid female suddenly hiding and refusing to eat. Those are all signs the flow is too strong for the tank.
With the filter sorted, timing matters just as much — when should you actually run it relative to your spawn?
Best Filtration Setups by Breeder Type
A lot of people ask me about this, and honestly, there’s no single “best” filter — it depends heavily on what you’re breeding.
| Breeder Type | Recommended Filter | Ideal Flow Rate | Notes |
|---|---|---|---|
| Guppy/Livebearer | Small sponge filter | Gentle, low bubble rate | Fry born free-swimming, need immediate soft current |
| Betta | Mini sponge filter or none for first week | Very low / near-still | Bettas build bubble nests; strong current disrupts them |
| Cichlid | Larger sponge or seeded internal filter | Moderate | Higher bioload needs stronger biological capacity |
Personally, I skip filtration entirely for the first 5–7 days in betta spawning tanks and rely on manual water changes instead — the bubble nest just doesn’t survive current, in my experience.
No matter which setup you choose, a few maintenance habits will make or break your results long-term.
Maintenance Tips to Keep Breeding Tank Filters Fry-Safe
Cleaning Schedules Without Disrupting Bacteria
Rinse sponge filters in removed tank water — never tap water, which has chlorine that kills your bacteria colony. I do this weekly for active breeding tanks, gently squeezing the sponge just enough to clear debris.
When to Upgrade Filtration as Fry Grow
Around week 4–6, once fry are noticeably stronger swimmers, I start transitioning toward a mildly stronger filter or adding a second sponge filter to handle the growing bioload.
Common Mistakes Breeders Make with Filter Maintenance
The biggest one I still see (and made myself early on) is cleaning too aggressively — full sponge replacements or tap-water rinses that wipe out your bacteria colony overnight, triggering a mini ammonia spike right when fry can least handle it.
Frequently Asked Questions
Do I need a filter in a breeding tank at all? Yes, in almost all cases — unfiltered tanks build up ammonia fast, especially with the higher feeding frequency fry need. The exception is short-term, closely monitored setups like the first week of a betta spawn.
What’s the best filter for guppy fry? A small sponge filter with gentle airflow is the go-to. Guppy fry are born free-swimming and relatively strong, but a sponge filter still keeps things safest.
Can I use a HOB filter for breeding tanks? Yes, as long as you add a pre-filter sponge over the intake. Without one, HOB filters are genuinely risky for fry under a few weeks old.
How long should I run a sponge filter before adding fry? I’d recommend at least 2–4 weeks of cycling beforehand, or seed it with media from an established tank to speed things up.
How often should I clean a breeding tank filter? Weekly rinses in removed tank water work well for most sponge filters. Avoid full cleanings more than once every few weeks — it disrupts your bacteria colony more than it helps.
Final Thoughts
Looking back at that first disastrous guppy spawn, I don’t think about it with regret anymore — more like it was the lesson that shaped how I set up every breeding tank since. Filtration isn’t the flashy part of fish breeding. Nobody brags about their sponge filter. But it’s quietly one of the things that determines whether your fry make it to adulthood or don’t.
If there’s one thing I want you to walk away with, it’s this: gentle, biologically stable, fry-safe filtration isn’t complicated once you know what to look for. It just takes the right filter, a couple of cheap modifications, and a little patience while it cycles.
You’ve got this — and your next spawn deserves better odds than mine did.

KD Sivanath is an aquarium enthusiast with over 7 years of experience in fish keeping and breeding. He specializes in helping beginners learn simple and effective methods for breeding popular aquarium fish. Through this blog, he shares practical tips, real-life experience, and easy-to-follow guides to help anyone start and succeed in fish breeding.